Difference between revisions of "Wizard/ja"
(Created page with "ウィザードの開始時点で利用できるアクションは、スキャンアイコン {{Inline button|Scan.PNG}} と終了ボタン {Inline button|Quit.PNG}} の2つ...") |
(Created page with "==スキャンプロジェクト==") |
||
| Line 25: | Line 25: | ||
ウィザードの開始時点で利用できるアクションは、スキャンアイコン {{Inline button|Scan.PNG}} と終了ボタン {Inline button|Quit.PNG}} の2つのみです。 | ウィザードの開始時点で利用できるアクションは、スキャンアイコン {{Inline button|Scan.PNG}} と終了ボタン {Inline button|Quit.PNG}} の2つのみです。 | ||
| − | == | + | ==スキャンプロジェクト== |
To start the scan project click on the {{Inline button|Scan.PNG}} icon; three icons green, yellow and red will show, each one represents a scanning strategy | To start the scan project click on the {{Inline button|Scan.PNG}} icon; three icons green, yellow and red will show, each one represents a scanning strategy | ||
Revision as of 09:01, 4 October 2017
インターフェース
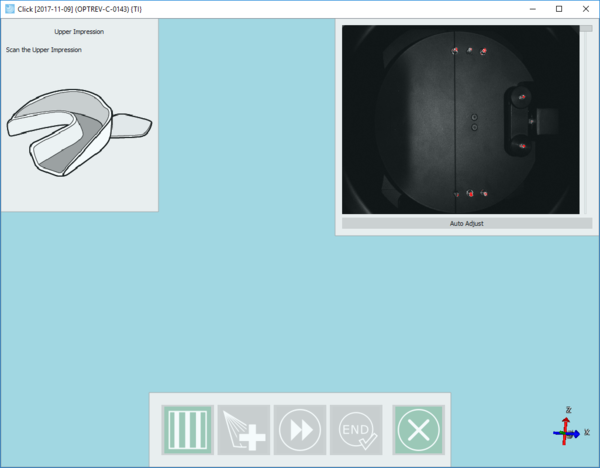
プロジェクト定義を完了すると、スキャンウィザードが開始します。
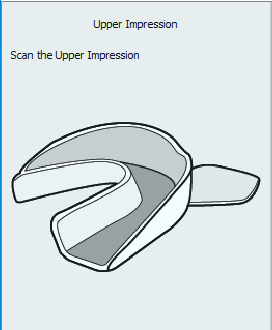
メインのインターフェースは非常にシンプルです。左上にはウィザードステップがあり、スキャンする必要のあるアイテムの説明と図が表示されます。
このウィザードは、プロジェクト定義で選択されたワークフローに基づいて進んでいきます。
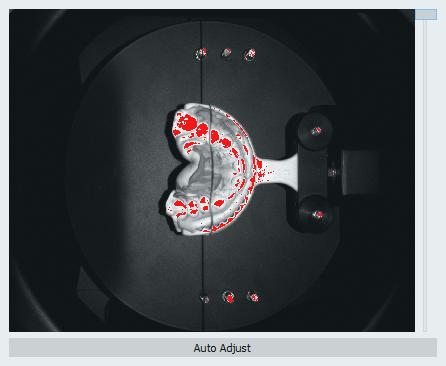
右上にはカメラのライブビューがあり、スキャンするオブジェクトの光量調整に利用します。以下は初期状態の光量を示した例です。赤く表示されている部分では、スキャンが困難になります。
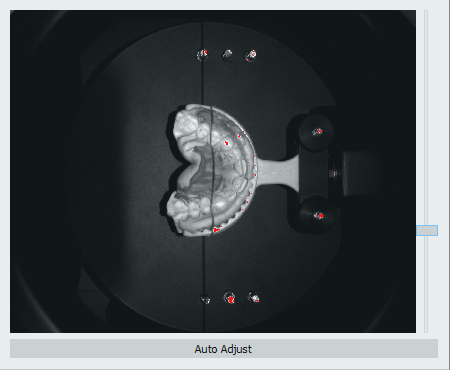
光量を調整するには、ライブビューの下にあるAuto Adjust(自動調整)ボタンをクリックします。
横のスライダで光量を手動調整することもできます。
インターフェースの下部には、アクションバーがあります。ここでは、ウィザード注に実行するアクションを決定できます。
ウィザード開始時点では、以下のバーが表示されています。
ウィザードの開始時点で利用できるアクションは、スキャンアイコン と終了ボタン {Inline button|Quit.PNG}} の2つのみです。
スキャンプロジェクト
To start the scan project click on the icon; three icons green, yellow and red will show, each one represents a scanning strategy
Easy
- Few scans and low scan strength. The scan is faster but holds less details of the impression;
Medium
- Medium number of scans and medium scan strenght. The scan is slower than the easy strategy but the image is more detailed.
Hard
- High number of scans and hard scan strength. The scan is as detailed as it can be but it will be slower.
Choose one of the three strategies to start scanning.
As soon as the scan procedure is over other two icons of the action bar will become available.
If the project is an individual impression the available icon will be the End icon.
Alternatively, if in the project need to be scanned two or more impression, the next available icon will be the Add Image Icon.
To add images to the acquired impression, turn the scan untill the spot that needs to be filled is completely visible and click on the Add Image button . Repeat the operation until satisfied with the result.
Then, if there are other impression to be scanned click the Next button .
Repeat the scan process seen before for all the impressions that need to be scanned.
When all impression have been scanned the End button will become available. This button closes the scanning procedure and starts the Export and Upload Procedure


